
The FCS-free Database compiles an overview of commercially available FCS replacement supplements for cell culture media, as well as medium compositions obtained from scientific literature. Some media are designed to support a particular cell type, others may support a wider range of cells. Users of the database can browse for their specific application by filtering for specific parameters. The user guide can be downloaded here.
Filter definitions
Cell line/type
The cell line/type filter is the main entry of the database, allowing to search for products which are available for specific cell lines or cell types. Common, commercially available cell lines are often abbreviated, whereas primary cell lines are written out. Some cells are (also) present with their Cellosaurus appellation (CCVL), for unambiguous labelling and standardised identification of a particular cell line. After clicking on ‘please select a cell line/type’, the user can start typing a cell type of interest and the results will be shown in a drop-down menu.
Animal-free
All products in this database are FCS-free. Media supplements that are entirely free of animal-derived components are listed as “Animal-free” and this criterion can be selected as a filter in your search. It is essential to note that human-derived components, such as human platelet lysates or human serum, are considered as “Animal free- yes” in this database. “Animal-free – unspecified” option encompasses media supplements that lack an extensive description on the origin of their constituents.
Source
The source filter allows to choose between different companies that produce FCS-free supplements or media, or to choose a product that is documented in scientific literature.
Species
The species filter allows users to choose the specific species from which the cells have been collected and on which the supplements or media have been tested.
Parameters
In addition to the filters mentioned above, the parameter filter provides additional possibilities to narrow the search. This filter contains sub-filters which become visible after clicking on the “+” sign in front of the parameter name. The parameters are organised alphabetically and comprise whether media or supplements are Antibiotics-free, Chemically defined or Contains phenol red. Note: not all the supplements and media contain information on those extra parameters.
Use of filters and filter options
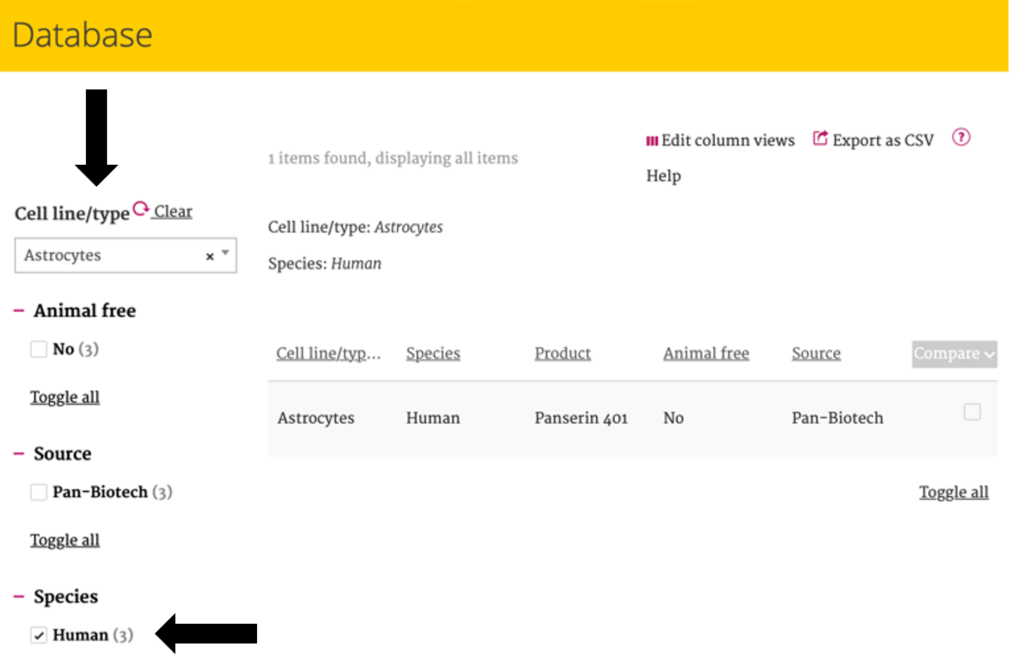
When no filter has been selected yet, a screen with a selection of default results is shown. The user can start a search by selecting a cell line/ type. Only one cell line can be selected at the time. After making the cell line selection, species, products, sources, animal free status and parameters can be selected. Some filters also contain sub filters which become visible after clicking on the “+” sign in front of the name. After selecting a filter, the other available filters will be adjusted. The chosen options are displayed above the data table for easy recall. To clear all selected filters at the conclusion of the research, users can click the ‘Clear’ icon located at the top left of the table.
For example: after choosing the of “cell line/ type – Astrocyte” and “Species -Human”, only parameters and conditions which are applicable to this selection are shown in the filters.
Presentation of results
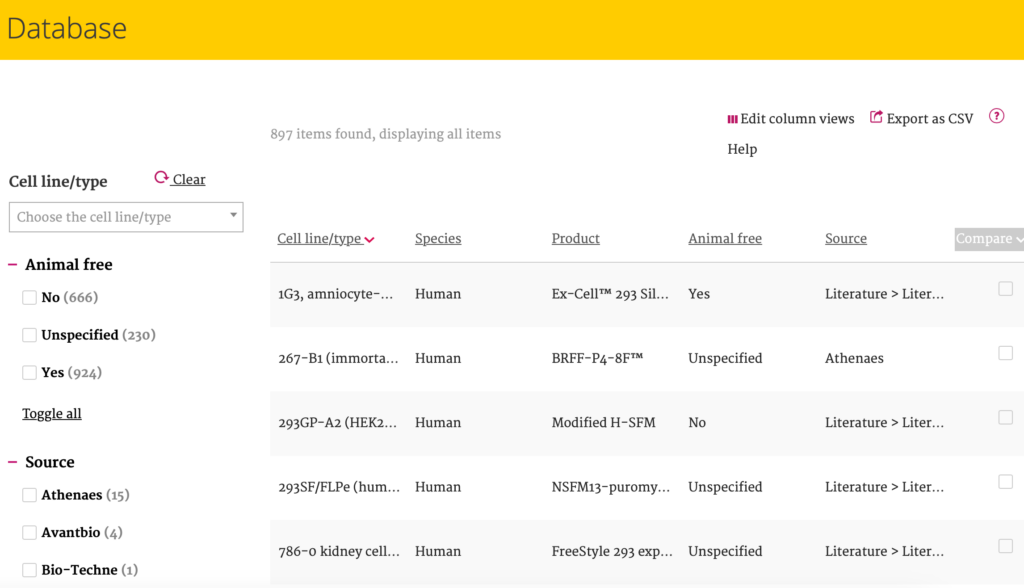
The outcomes of the selection appear on the right side of the filters in the results screen. The filter names serve as column titles in the results display. Using the ‘edit column views’ option, users can determine which filters or parameters will be visible in the results screen. Clicking on a column title allows the user to sort the results. Long texts in the results screen are shortened, and a part of the text is shown followed by dots. When moving the computer mouse over the text, the full text appears.
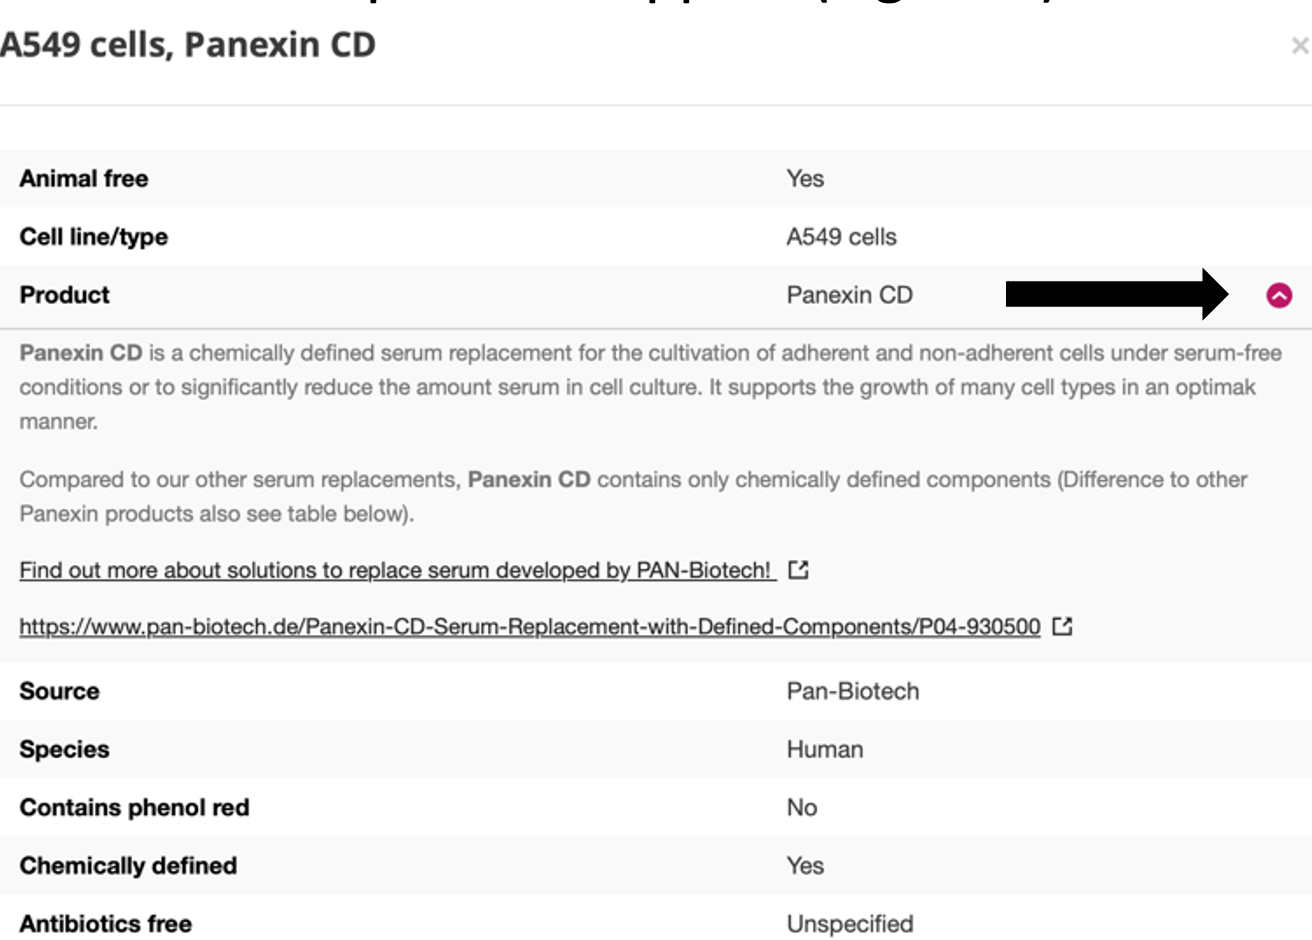
By clicking on a result (anywhere), a pop-up window will appear with more detailed information. In this pop-up window all data that are available for the selected combination (animal free, cell line/type, product, source, species, and other parameter) are shown. For all data, a product description is available by clicking on the red arrow next to the parameter value. In case of commercially available products, this information also contains an URL to the website of the product supplier.
Comparing results
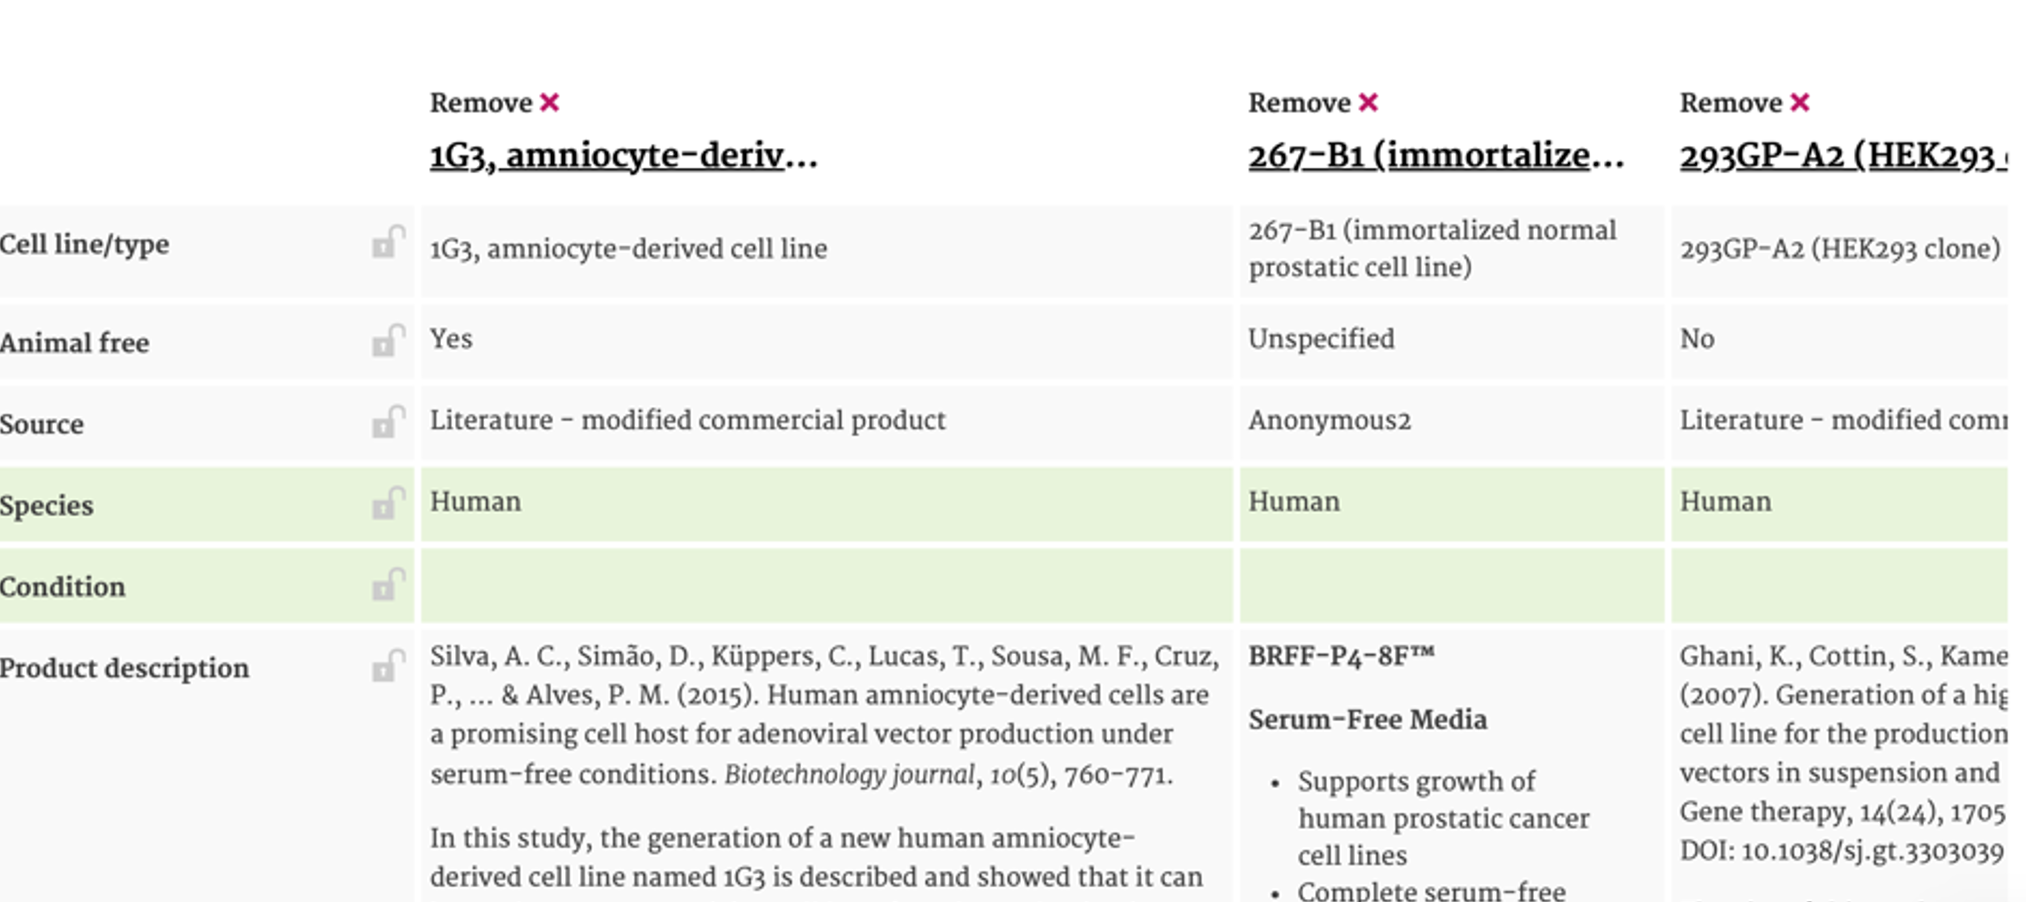
To compare results, the user can select multiple boxes at the right end of each row and click on ‘compare’. The compare screen will appear, displaying filter titles and parameters in rows and species in columns. When the results for a particular parameter are similar across the different results, the corresponding row is highlighted in green facilitating the identification of similarities and differences in details between the media.
The rows in the compare screen can be locked, so they will stay in position when scrolling up or down. More detailed information on the results becomes visible by clicking on the cell line. This triggers a pop-up window like the one in the results screen.
By clicking ‘back to overview’ the user returns to the results screen. All selections remain and no results are removed. Removing results can either be done by clicking ‘remove’ in the compare screen or by tapping the boxes in the results screen again (deselecting them). Without doing this, in another selection session (even when clicking ‘clear’) the results will still appear in the compare screen and multiple selection sessions can be compared. Selected results can be removed by refreshing the internet browser.
Additional features
The user can edit the columns shown by clicking the ‘Edit column views’ button in the top right corner of the database. It is also possible to sort the results based on a specific column by clicking on the column name. Furthermore, it is possible to export the search results into a CSV-file, by clinking on the ‘Export to CSV’ button in the top right corner of the database.
Note: To prevent that all results from differ columns merge into a single column after exporting, users need to use the ‘text to columns’ button to separate the contents of each cell into distinct columns (in Windows Excel).